|
Star Date: November 27, 2001 Hi, I have decided to keep a construction log of the creation of this new type of DaQo'tah weapon.
The Gunstock War club , is unlike any other DaQo'tah weapon ever made before. Hopefully it will set the standard for all such weapons to follow.
To help you better understand the real battle that is involved during the creation of such a new weapon, I will write down the days events dealing with the war club, as well as any interesting stories about the different problems or victories that I might incounter.
I will also try to list the amount of money that this weapon will take in tools and supplies, to complete.
As you have read by now on the previous page, the design of the War Club took a bit or work to finish. But now that I have a good design to work with, my next step was "the steel".
GETTING THE STEEL!
Today I went to the welding shop and got some steel scrap for my warclub. I had hoped to find a leftover piece of steel for free, but they just didnt have the size I needed for this weapon.
I took a tape and measured the length and with of the paper pattern before I went down to the welding shop.
The tape said I needed a one foot by 3 foot 2 inch section of steel.
They had that size all ready to go in 1/4 inch steel, but after I had made my Super Batleth out of 1/4 steel , I made a promised to myself , "Never Use that Crap again!".
1/4 inch is just to thick for my drill bits it punch though , so I have limited myself to only useing 3/16 from now on.
I did manage to find a nice piece of steel, but it was about twice as big as I needed. If I would have wanted one cut to exact size they would have charged my around 7 dollars to cut it,(way over my budget) so,,,I got the larger chunk to save money....(Yes, I spent more than I wanted, yet still saved?,,,only in America.)
I walked out of the welding supply shop,,,,( er,,actually kinda hobbled out), with a 4 foot by 2 foot peace of 3/16 inch steel for 13 dollars.
after I had manhandled the thing into the house (its very ackward to carry) I took it down stairs to work on.
The first thing I had to do was clean it up. I got a bucket full on warm soap water and washed one side of the sheet of steel real good. The reason I do this is that I need one side with no greese or oil on it so that my paper pattern will stick useing spray adheisive
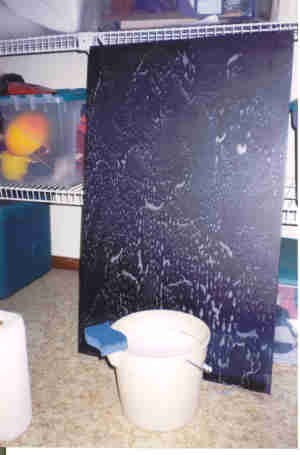
After I had washed all the greese and oil off the sheet of steel, I stood it up , whiped it dry and let it air dry totally.
Next, I went out to my shop, (the actuall DaQo'tah Forge) though the foot deep freshly fallen snow and found two cans of spray adheasive. Just what I needed!
The cans were ice cold from being out in my unheated shop,so I had to let them stand and warm up enough to use. 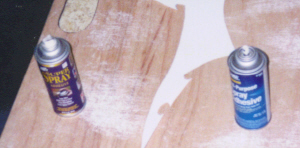
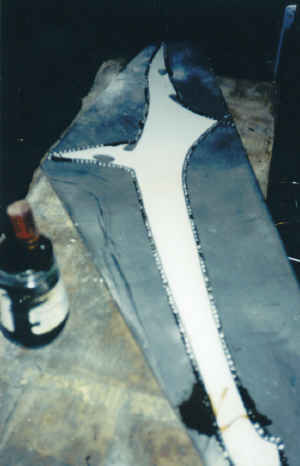
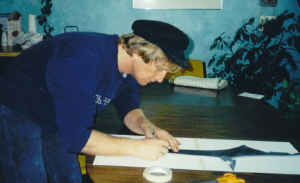
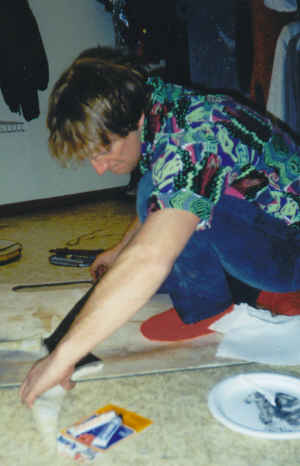
Glueing the Paper Pattern.
Trying to glue down a pattern thats this huge is a real challenge.
Heres what I did...
I found a 3x4 peice of plywood for a drop cloth, and layed it out on the floor. This I hoped would work to keep myself from spraying glue on the floor of my wifes walkin closit, (remember, if I mess up and spray the floor, you dont know nothing about it, ok?) and layed the paper pattern, face down onto the plywood.
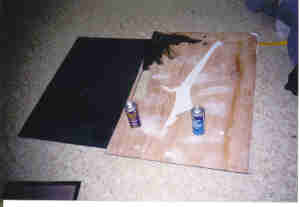
Next to this, I placed the steel flat onto the floor.
After I had the spray can of glue all shaken up to mix it, I sprayed the pattern. I gave it a darn good coat of glue, then let it sit to take up.
I had a 2nd lightwight paper pattern left over from the Design Phase, so I got it to help me deturmin where to spray the steel.
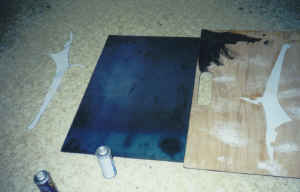
By useing this extra copy of my pattern, I was able to really douse the steel with glue in the spots where the pattern wil lie.
After both the steel and the pattern have a good coat of glue on them, Its important to make sure they have time to rest while the glue sets up.
I test the condition of the glue by tapping the steel in a out of the way place with a finger. when Im sure the glue is extremely tacky to the touch, I begin the carefull process of placeing the pattern to the steel. 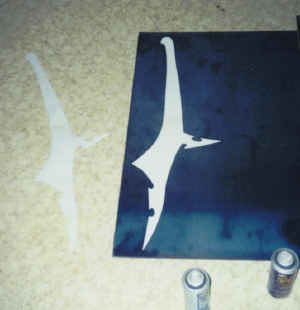
While placeing the pattern onto the tacky glued steel, Its important not to mess this step up with a clumsey placement, You only get one chance to lay the pattern down.
(Hint; Do not drink before you attempt this step)
So as I do this step, I have to be absully sure where I want it to go, and where my hands are positioned.
I try to lay the pattern down in such a way to not have any wrikels. With a long pattern such as the one for this warclub, I try to lay the middle carefull down first, then working from the middle out to the ends without letting a kink happen in the paper.
Once both ends of the pattern are down, its too late do do anything about it, If I made a mis step and have a wrinkel?. the pattern is wreacked, START OVER!
I did ok ok tonight, the paper pattern laied down nicely, and I smothed the paper down flat. I also smotheed the points of the pattern down too, If during the drilling process the pattern starts to come of, its likely to come off first at these narrow ponts of the knife blades. The last thing I did tonight was to find a place where I could set the steel do dry thoughtly undisturbed for the whole night.
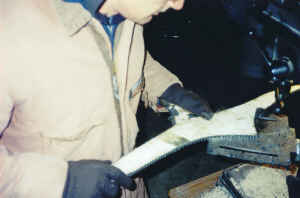
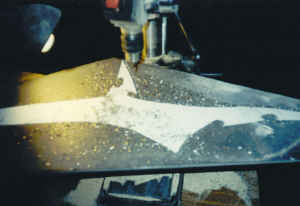
My next step,is marking around the pattern, then out to the winter cold DaQo'tah Forge shop, for the drilling around the pattern. STAR DATE,NOVEMBER 29 Today I took my heavy peice of steel to work with me. I needed to use what we call the "Quicky Saw" to cut the steel into a section I can work with.
I found that the pattern placement is too far into the sheet of steel to alow me to use my drill press.
After all my co-workers had went home and it was all quiet on the jobsite, I brought out the gas powered Quicky saw and fired it up.
cutting steel with this thing at night put on quite a show! I was sending sparks into the air for over 20 feet! It was hard to even see where I was cutting there was such sparks. Thankfully my thicker grade paper used on the pattern stood up to the heat fine.
took about 10 minents to cut free, now I have a workably sheet of steel that will fit under the throught of my drillpress. STAR DATE: November 29,2001 Thank god its friday! I cant waite to start in with makeing my newist DaQo'tah type weapon.
On the way home from work I picked up some drill bits from Acme Supply. I got the type of drill bits that have threads on each end, so really you get 2 bits for the same price as one. Each bit was one dollar and I got 4 of them in the 1/4 inch size.
STAR DATE: December 2,2001 Hi! This is DaQo'tah!
I have spent the last two days hard at work constructing my own design of the war club.
And things were going so well, until trouble reared its ugly head.
I had just finished drilling the perimeter, 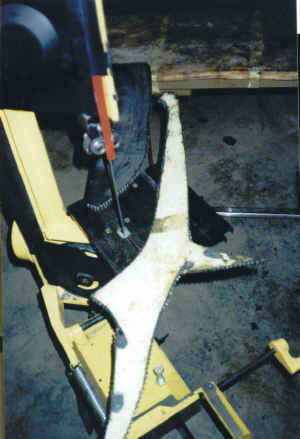
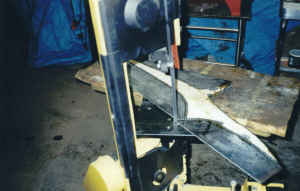
Cutting the blade free, 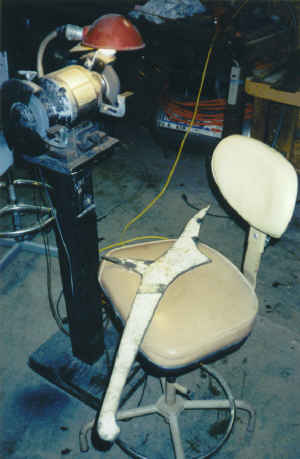
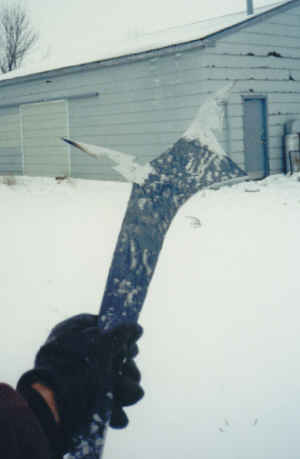
and grinding on some crude bevels to the blade edges when I decided it was time to make those distinctive cut-outs which appear on both the blades.
Now, the cutouts are the most important aspect of this design... indeed, its the cutouts that make the warclub look distinctively mine.
I intended to use the method K'Daq uses to produce saw-teeth on his knives and only just scale it up to the cutout size that I'm attempting.
For those of you who don't know, K'Daq advises using a drill bit precisely sized to the saw tooth you wish to make. The drill bit will leave a nice rounded bottom to the saw tooth which is otherwise hard to reproduce by other methods.
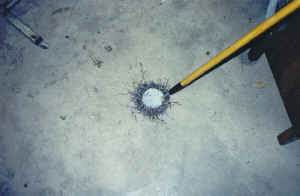
So I ran out to a lumber yard and bought a brand new half-inch drill bit, figuring this was exactly what I needed to produce the cutouts. I marked the spot on the steel where I wished the cutouts to go, indented those points with a round pointed sledge to leave an indentation, pre-drilled those areas with an eighth-inch drill bit, and then chucked into my drill press my brand new half-inch drill bit. With extreme confidence in the emminent success of this method, I cranked the drill bit down into the steel. Instantly, the drill bit turned cherry red and went dull.
I haven't the slightest clue why it failed like that. But since it was Sunday morning, and in North Dakota we have a blue law which prohibits stores being open before noon on Sundays, I was screwed!
Time to improvise. Switching to my wife's Dremmel tool, I spent the entire morning buzzing away, going through one tiny cutting disk after another until I finally achieved a look, more or less, of what I was looking for. It's not going to be perfect, but it's the best I could do under the circumstances.
After I was happy with the overall shape of the steel, I traced the warclub outline onto thick construction paper.
This will become the pattern for the wooden body of the Warclub and its handle. 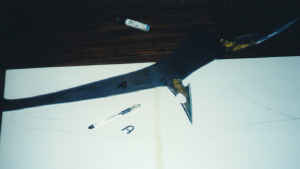
When I make any handle pattern, I always mark things so I dont end up with stuff upside down.
Notice the letter (A) on both the steel and the pattern?
When its time to cut out both inch thick wood sides to this weapon I will mark each with a letter (A) so they can never end up flipped over (Yes I had to learn to always do this the hard way....I once ended up with to left sides to a knife,) 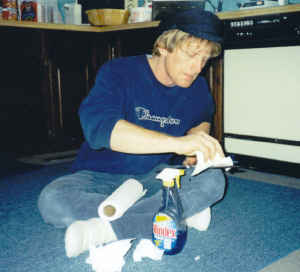
Time to clean all my fingerprints off the blades so i can... 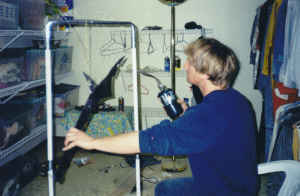
COLOR IT WITH FIRE! 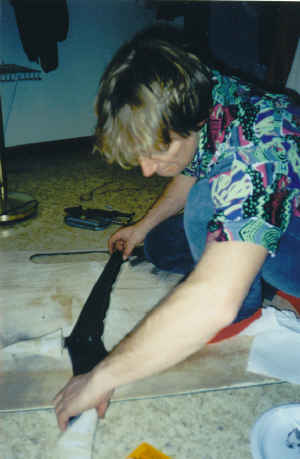
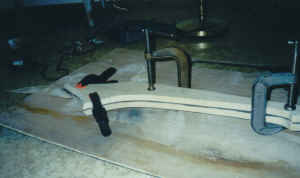
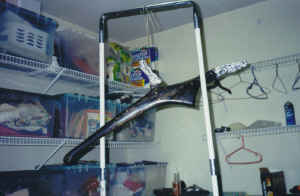
Recently, within the last hour, I began applying epoxy glue to the large wooden scales which will form the bulk of this warclub. I have also drilled holes where I expect to place brass pins to help strenghten and stabilize the weapon.
Let's see, what's left to do... put the brass pins in, sand them down to flush, sand the entire weapon smooth, sand the handle grip area down, buff everything with an extremely light sandpaper, wipe it all down with a soft cloth, stain and lacquer, apply the grip treatments.
Let us hope nothing else will go wrong. I will keep you updated as to how things go.
STAR DATE: December 3,2001 FINISHED! 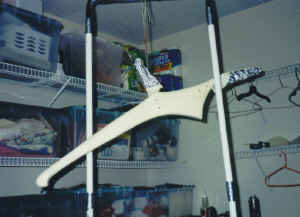
I was sitting around watching the Tv...when I just all the sudden got sick of doing nothing and ran out to my forge and finished the warclub.
I picked up some 1/4 inch brass rod for about $4 and some new tubes of J.B.Weld for about $5 each.
Everything worked as good as I could have hoped for. The sanding went a bit longer to do then I had first thought, but this was only cuz I had never sanded down this much wood before.
I wrapped the handle and took a few photos, 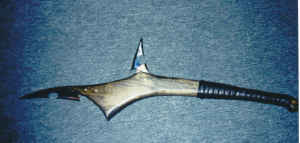
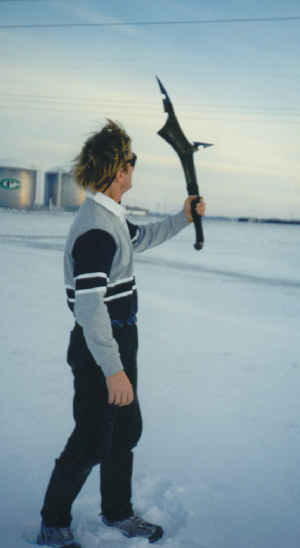
Time to get out the magnet and clean the floor under the drill press. I used the same stain and stuff that was used on my Super Bat'leth so if you need some more info on how I do that look at its webpage. I again took the Warclub to work,,,and one of the guys said he wants it, so I will have to decide if I want to sell it or not now. STAR DATE: December 4, 2001 Time to sum things up.
first how much money did this weapon take to make?...well, lets see.. the steel was $13, the drill bits were $4 and $6.
The wood was $10 and the glue was $7. and the brass rod was about $4 .
so that comes to-about $44 plus tax.
this weapon did not take long to make,,,just a weekend, but it was a busy,full weekend of work to get it done.
The design was the one hard thing to do on this type of all new DaQo'tah weapon. Speaking of that, I remember now, I had about $2 in photocopies used as well.
If you are a new Weaponsmith I made this weapon with You in mind, I just wanted to show the new person, as well as the members of the KIWG that have yet to make a weapon , just how easy it is to bang a weapon out in a weekend.
I hope that be reading along in my "Logs", the new person will be able to learn what to expect and to not get upset when thigs dont always go right.
like- When I was going to make the blade cut-outs with that new 1/2 inch drill bit, and it burned out on the first hole. I just had to switch to "Plan(B)" and keep on going...LOL
so, dont let the fear of the unknown stop you from starting, You just got to have faith that,,,somehow, you will think of something, and it will be Okay.
thanks for your time,
DaQo'tah
|