|
How to make a Meqleth (mek'leth)
The following are instructions on the fabrication of a
Meqleth.
This is not supposed to be the only way that such a weapon can be constructed, but the following instructions and photographs should provide the novice with a general overview of a simple, easily copied construction method.
If you would like to ask DaQo'tah a question,
or make a comment about something seen here,
You may reach him at-
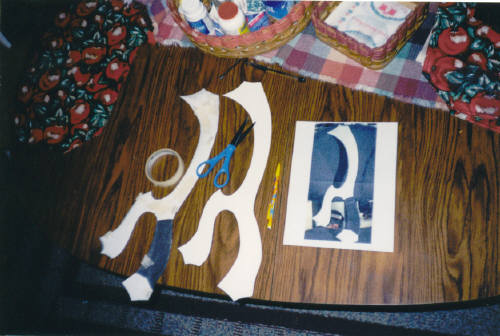
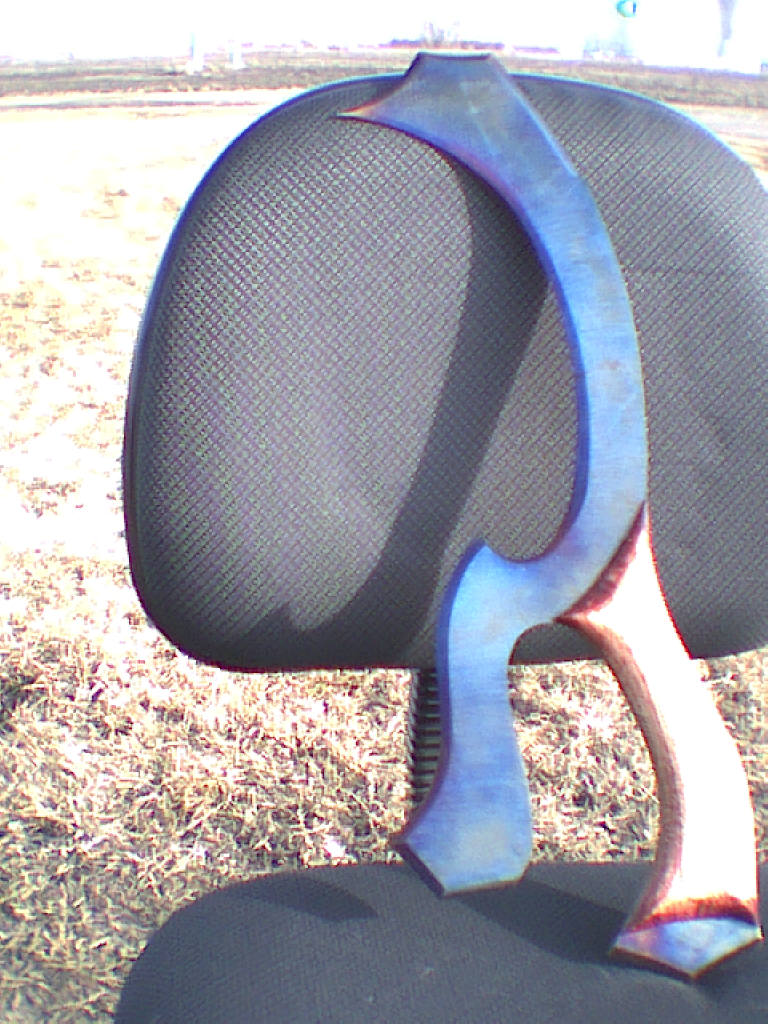
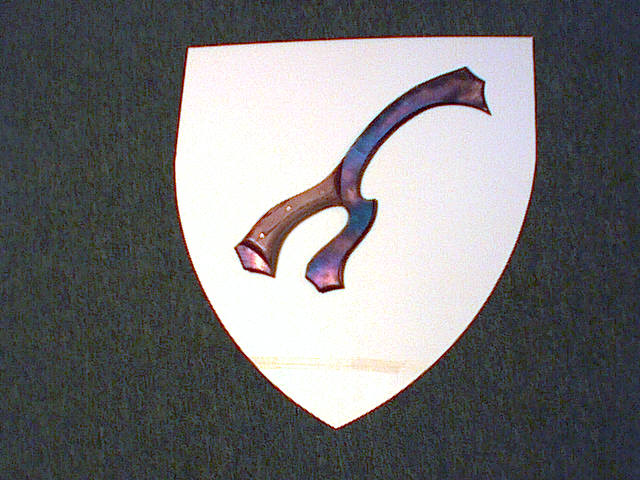
The first thing you got to do is find yourself a really good photograph of a meqleth. Search Science Fiction magazines, library books, and especially Internet sites. The meqleth we will be making here is an exact copy of the one used on the television show
I went online and found a photograph taken in a movie prop department. The photograph displayed a meqleth leaning in a common office chair. I printed out this photograph (you see it on the right hand side). By using the chair in the background of the photograph as a guide to determine the correct size of the weapon, I used the photocopy enlargement feature and blew up the photograph to life size.
The steel we will be using is commonly called mild steel. We are not concerned really with edge-retention ability of the steel, because although this weapon will be for all intents and purposes very dangerous, it is at heart a display piece. Once the necessary amount of steel has been acquired, it must be thoroughly cleaned.
Not only do I wash my steel with soap and water, I also like to hit it with Windex to remove any oils from my fingerprints.
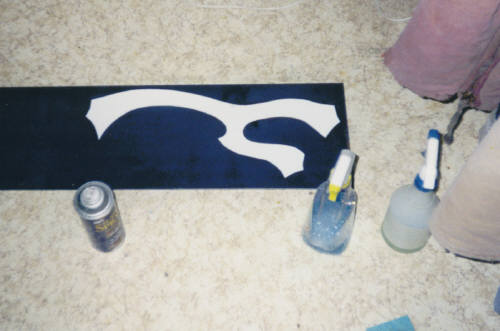
Once the steel is good and dry I spray the steel where the pattern will lay with a good dousing of spray adhesive.
I also spray the underside of the pattern.
At this point, before you stick the pattern down onto the steel, let it set for a while until its very tacky to the touch.
Then place the pattern down onto the steel with confidence of where it will lay. Remember, your pattern is just made out of paper, and you dont get a second chance. Once its down, it stays down.
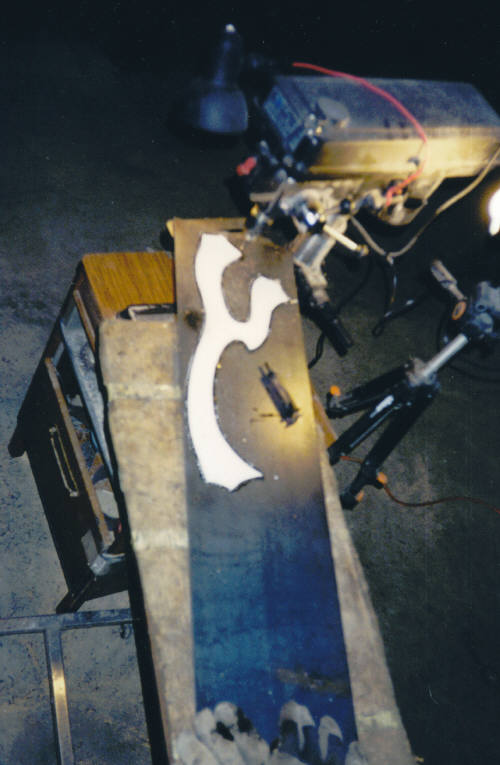
Because I dont have a cutting torch (yet), I have to separate the blade from its bed of steel by drilling a series of ¼ holes with my drill press all along the pattern perimeter. Sometimes this much drilling can be rather brutal on your poor little drill bits. I have discovered a way to prolong the line of my drill bits. What I do is I make two passes around the pattern, drilling each hole only halfway through the steel. I then take a small syringe-like item; load it up with whatever grease or cutting oil I have concocted, and squirt a drop into each of the zillions of little halfway drilled holes. I then proceed to drill around again, this time drilling all the way through.
Connecting the dots.
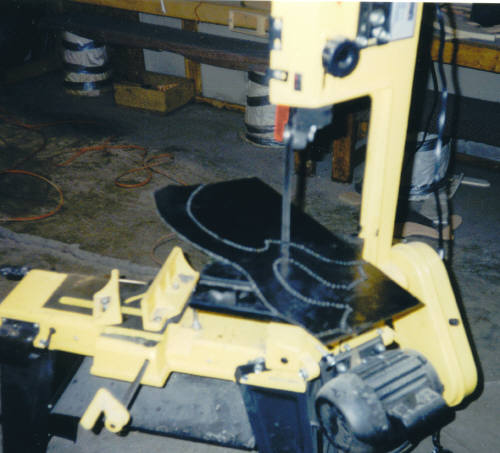
Using the metal cutting band saw, I slice through each drilled hole, cutting the remaining wafer-thin piece of steel between each hole. If youre not lucky enough to have a wife who blessed you on your birthday with a brand new metal-cutting band saw, a jigsaw with steel cutting blades works just as well.
What if you dont have a jigsaw?
Then I suppose you can just whip out your sledgehammer and chisel and get medieval on it
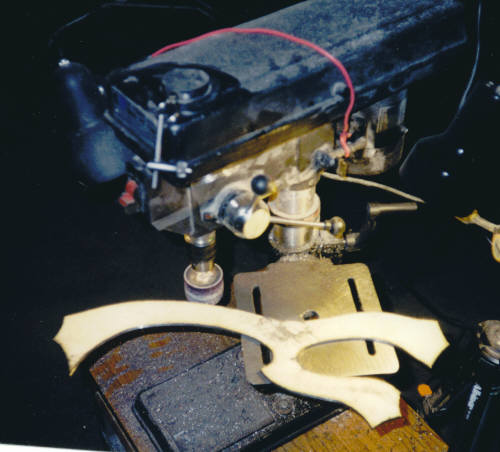
The next step, once the blade has been freed of its bed of steel, is to grind off all the little nibs of steel that are left over from the drilling process. I have found a little steel-cutting rasp that chucks into my drill press. Another thing that works well is to grind off the nibs with a regular bench grinder.
Once all the nibs have been ground off, I place a round sanding drum into my drill press and smooth the steel right down to the edge of the pattern lines.
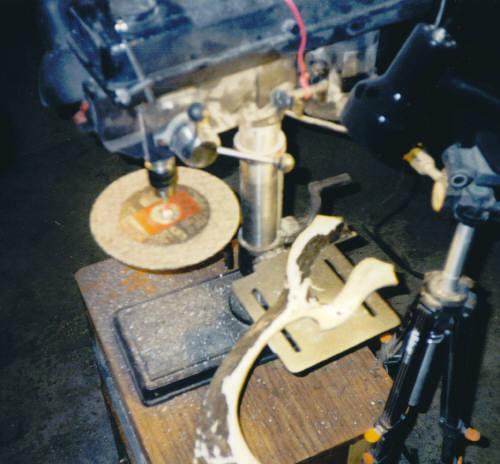
We next have to clean off the pattern from the side of the blade, as well as sand down both sides.
Here we see a sanding disk that again has been chucked into the drill press.
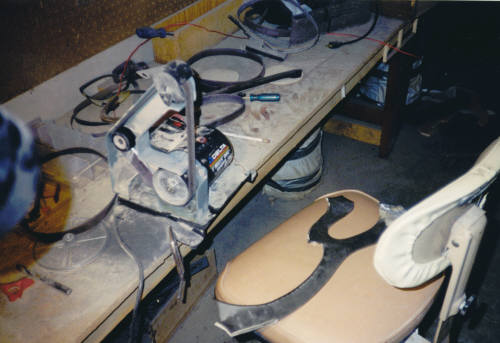
Once both sides have been prepared, and the entire edge of the weapon has been sanded down to the pattern, its time to place our beveled edges. The meqleth has lots of complicated beveled edges so take your time.
Here you see my one-inch belt sander that I use to place my beveled edges.
I like my weapons to be rainbow colored, rather than just the standard chrome of a polished blade. Here you see me using a torch to heat up the steel until it turns color. If you have any questions about this step, please refer to the web page where I deal with that subject.
As far as I know I'm the only person who colors a Klingon weapon with fire like this.
Once the weapon has been colored and allowed to cool, place it down on the construction paper and trace around it. Then, using a pencil and a good eraser, start designing your handle. The meqleth handle will stop short of the very butt end, allowing some steel to show there.
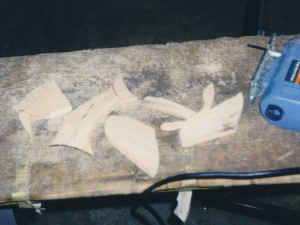
Once you have the handle design finalized, pick out some good quality half-inch pieces of wood. I like oak for the grain. Place the cut out pattern for the handle on the wood and trace around it. You then just cut it out with a jigsaw using a scroll-cutting blade.
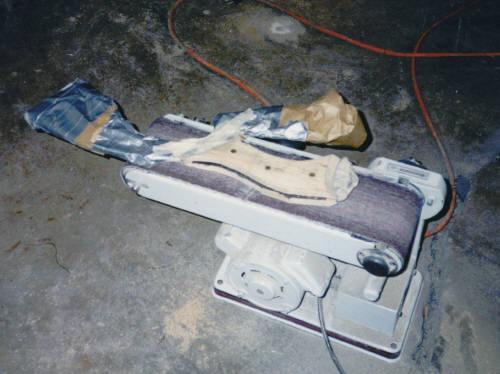
Because the wood for your handle is often slightly warped, it must be sanded flat.
Here you see one of the sides of my oak handle atop the four-inch belt sander, being sanded flat.
The Mek'leth Handle
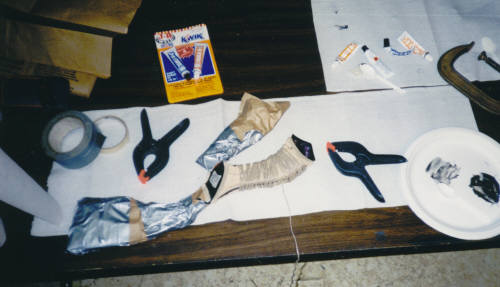
The first thing you have to do here is cover all the exposed parts of the blade with masking tape and cardboard or whatever youve got. This will keep you from accidentally getting your fingerprints on the blade as you work on the handle.
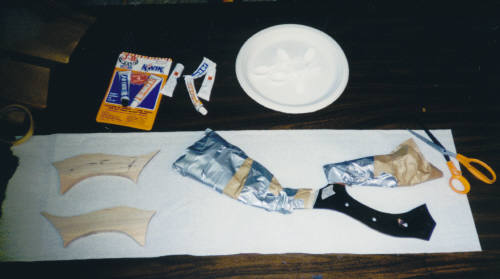
You need to purchase some type of epoxy. Although most knife makers use something called two-ton epoxy, I like to cheat and use JB Kwik, due to its incredibly fast (six to eight minutes) set time.
Using a plastic spoon and paper plate, I mix up enough epoxy for one side of the handle. The oak is coated with the epoxy, positioned on the steel, and then held in place by wrapping string around it dozens of times.
Ive found that string works better than simply clamping it because clamps tend to squeeze out the glue.
Its easy to wrap string around the open end of a handle like this, however it was very hard to wrap the Bat'leth handle with string.
Care must be taken to keep everything in place .
The second oak handle side is glued into place.
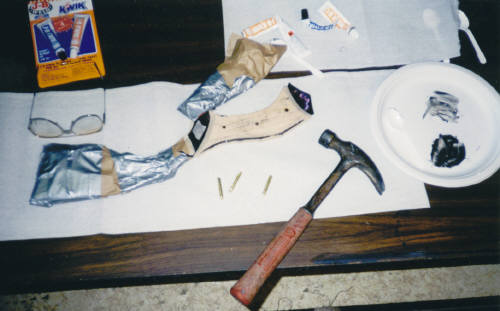
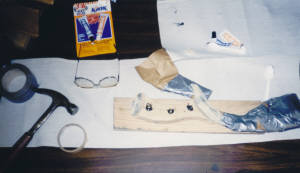
I decided that in addition to the epoxy, I would also hold the oak handles to the steel with brass pins. Having drilled through the handle in the exact spots where I wish the pins to be, I then cut three pins from a ¼ inch rod of brass.
Each brass pin is taken to the belt sander and has a slight point sanded on one end. This will help it slide into the hole later. The entire pin is also slightly sanded to provide scratches and grooves for the epoxy to hang on to. You can see the three pins, which are about to be driven into the handle in this photograph.
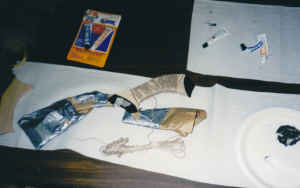
The epoxy for the pins is mixed. Each pin is rolled in epoxy; the pointy end of each pin is positioned in the hole, and is driven into place with a hammer. Make sure to leave a little of the brass pin sticking out on both sides of the handle.
I have never had my handle glue fail me yet, however I believe that in the future there is a chance that this weapon might be used to take down trees and such. Thats why I have added the brass pins for more support.
You never know the things people might try to knock down with this Mek'leth!
Once all the glue that has been used so far has had the proper amount of time to set and get hard, its time to begin sanding down the handle. The first thing you have to do is knock down any of the brass pins that are sticking out. I then take the handle to the one-inch belt sander and sand everything so that the handle feels comfortable in your hands.
If you dont own a belt sander, I would use a wood rasp . Yes its a lot of work, but it will still work .If you have a knife, you might be able to take of the extra wood with that, and then just sand it down after.
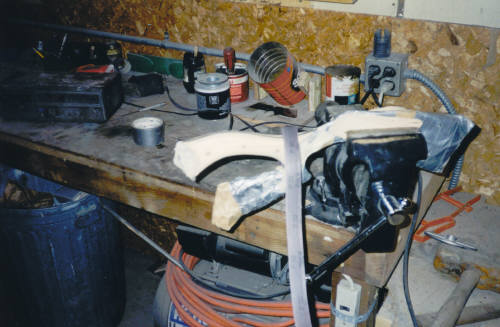
I like to keep testing the handle for fit as I sand, you can always take off more, but it's hard to put it back.
Sometimes it helps to place the blade of the weapon in a vice and use a one-inch wide piece of sandpaper (a busted belt from the belt sander) to sand the hard-to-get areas.
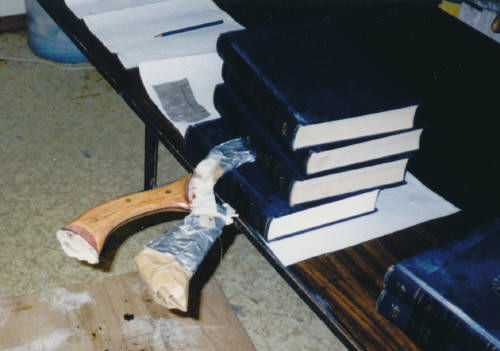
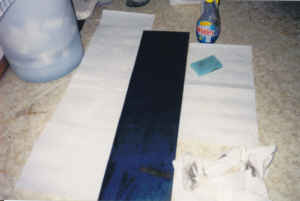
Once the handle is formed, its time to stain. Here you see a photograph of that being done. Im holding the blade of the weapon steady under a pile of encyclopedias (as far as I know, this has been my only use for them). A drop cloth, or in this case, a drop sheet of plywood is placed under the weapon and its stained following the directions on the can. The moment of truth comes when you are completely done creating this weapon and you begin to strip off all the protecting tape and cardboard.
|
|
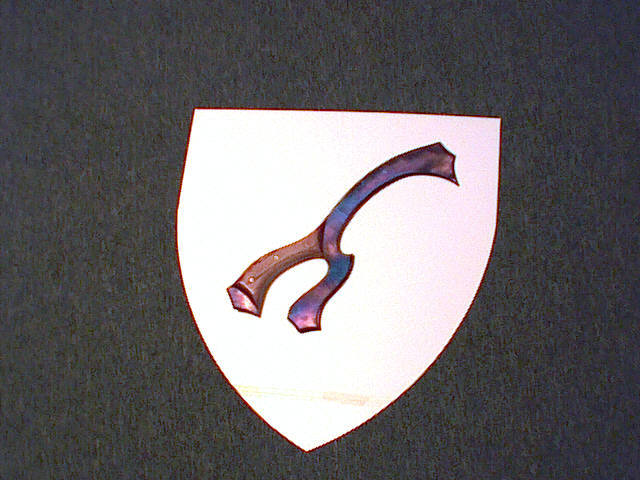
| Photo of the real prop that was used on the TV show. |
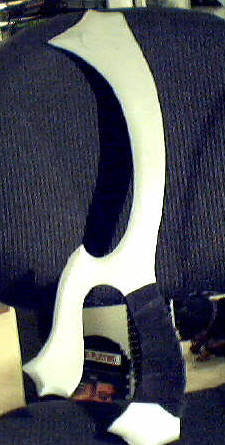
Only then will you know what your weapon truly looks like.
In this case, I was pleasantly surprised.
Everything ended up way better than anticipated. What do you think?
The DaQo'tah Forge Website is the most busy Alien Weapons site on the World Wide Web.
As such there is always a new design being added to the collection all the time.
You may write DaQo'tah with your comments about this weapon, at-
|