|
To really see the connection I have found in the way a weapon like a Bat'leth is used in battle, and the way the Gunstock war club is used, rent the movie- The Last Of The Mohicans, where the Gunstock War Club is used in many fights on screen.
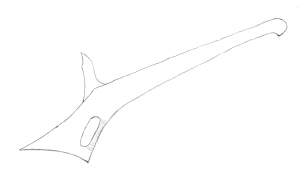
This is my first try at making the war club look more DaQo'tah-like. As always, I find the hardest part is getting started, and the first idea is the hardest to find.
I thought that I should add some different looking sharp points in places.
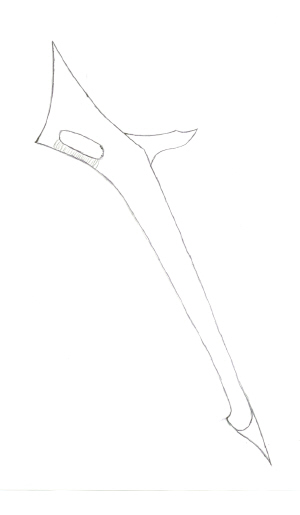
In this drawing, I have added some interesting ideas to the design. I drew a second handle opening at the top of the weapon that looks much like the Bat'leth handle.
I have slightly changed the knife blade in the middle of the club. I do like this design so far.
I have also added a blade at the lower end on the war club to make it look like some other weapons that have sharp points at each end.
At this stage I decided to add another edge at the top of the weapon.
I was thinking that such a edge would help the war club look more DaQo'tah-like.
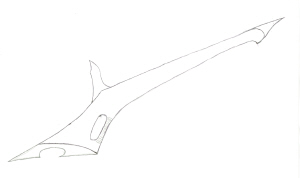
The moment I drew this design, I fell in love with it. I thought this design for a sharp edge at the top of the War Club was just what the whole design needed.
It looked sexy to me,,,then I started to understand why it looked so sexy,,,,,,,it looks like a woman's leg in High Heels!....
Oh NO! Now I had to totally re-think the whole design when I saw that! I wanted to keep the idea of a sharp edge at the top,,but I wanted to get rid of the chance that it looked like a leg in a high heel. 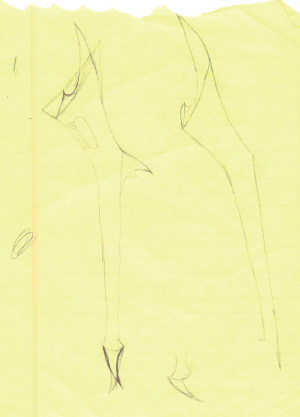
I tell the new members of my Weapons Guild that my hardest battles always take place for me in the design stage, and here in this photo you see me deeply in the middle of such a design battle!
This is WAR!...me against the "High Heel" design problem!...
Notice the way I'm still trying to keep the top blade, but just change it a little.
This is also where I was starting to think I might not be able to come up with a design idea for an all new DaQo'tah weapon...
I'm also busy trying to change the middle and lower blade shapes too. However I didn't like the "Shark" look so I didn't take this design far. 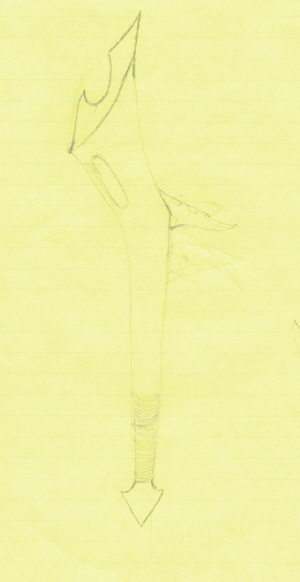
This photo shows how I got rid of the "Shark" blades, and now I'm looking at maybe putting some interesting cut-outs on the blade edges.
The Middle blade has some saw teeth (very cool),
But now the darn lower blade still looks like it's just not right yet.
I'm still trying to keep most of my top blade's shape that I like so much, and yet change it enough to look less leg-like.
At this point I as well started to think about the leather for grip on the handle. This is also the 1st drawing that my wife helped me come up with.
It's always good to have a 2nd set of eyes when you start this design work.
I find that I need to get my wife's point of view on new weapon designs to help me see things in a clear and honest way. 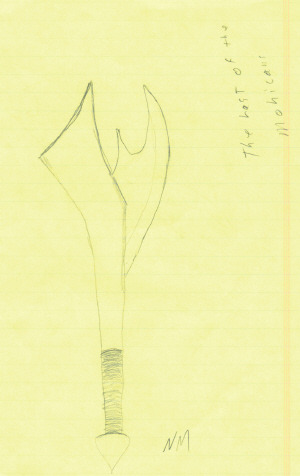
My wife and I worked on this design.
It's much like the one above and shows how I was starting to look for a different way to make the Gunstock war club look more wild.
We tried to just slam a Bat'leth into this design.
Well, ok, that didn't really work, but it did give me some good ideas for my next few designs.
I started to knock around the idea of using some of my knife design elements on this new type of weapon.
I started to think that maybe the top blade should be a knife, like the middle blade is.
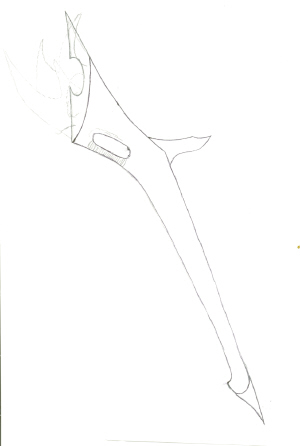
This design shows that I have returned to the very cool looking middle blade design from before.
But as you can see, I'm not yet sure at all as to the way I want the top blade to look.
I still have a "Hand Hole" handle like on a Bat'leth, but this idea will prove to not work due to the size needed for the handle set inside the body of the club.
The lower blade shows again that I wish to keep it... but how?
In the next design photo, you will see that I was about ready to settle for a top sharp edge without a cut-out like I so wanted to keep. 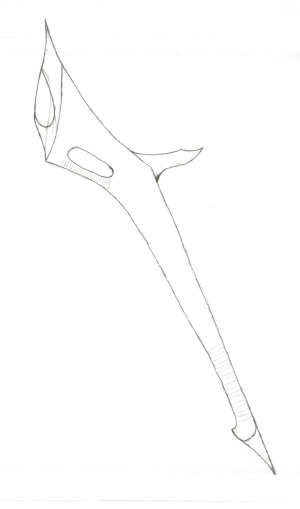
I'm about ready to give up.
This was almost my last design attempt for this weapon,,, and I hated it......
I had now everything just the way I thought I wanted it to look,,,yet it just didn't look like a Indian Gunstock war club anymore,,,,nor did it really look that wild yet.
I was about to close up and turn to a different weapon design, when, out of the blue, I thought of a new way to draw the blades of the knife edges.
The thing that saved my design was when I got the idea to turn the base line of the top edge.
The moment I did this I changed the whole look and got rid of the "Leg in high heels", problem that had so troubled me. (thank Gawd)
Now I knew this weapon was soon going to look very cool and very dangerous...I just had to keep changing a few last things to get it all drawn out right.
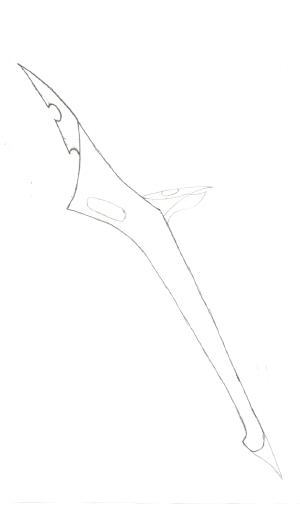
We are getting close now!
With this drawing, I saw the look I was shooting for all along.
I just love the top blade now,,,it looks very Un-human and very DaQo'tah-like. This type of blade edge fits right in with many of my other DaQo'tah weapon designs.
You can also see in this drawing that I'm now dealing with the middle blade again.
(darn that thing, I can't seem to get the right look for it)
I have decided that I don't like the old way I had the middle blade looking, and now I'm starting to draw out a new look for this middle blade.
I'm also having 2nd thoughts about the lower blade too.
Perhaps the lower blade is not needed?
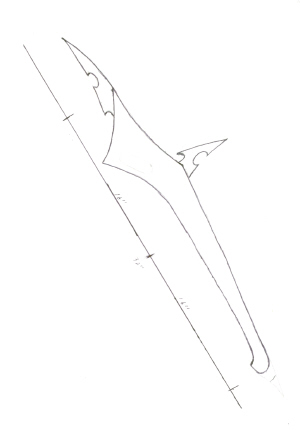
DONE!
With this last design drawing I have come to the end of this stage in the creation of this new DaQo'tah weapon.
I love this design I ended up with, I love the top and middle blades now, they look so cool.
And I love the way I have kept the Indian Gunstock club look as well.
notice that we have dropped the lower blade to keep the weapon club-like looking.
what I have ended up with is a design for a All New DaQo'tah War Club! This weapon if completed, will be the only one of its kind,,maybe the first of its kind too!
Im so glad to be done with the design stage, I hate this stage in weapon-smithing. I wish I could have just stole more ideas off the web..LOL
Now we are all set to move on to the next step, the Pattern!
Creating the Pattern! I bet that you must think that by now, after all this work, that I must be done making the pattern, right?... well you are WRONG! You see, I don't really have a "Pattern" yet. I just have the pattern's "design". The real pattern will be the actual thing that I glue to the steel, as such, the real pattern must be "Life Size".
Now I intend for my Warclub to be well over 3 feet long, and right now my design pattern is only 7 inches long?
So as you can see, we are going to have to "Bump" it up a bit..This is how I do that,,,
I take my final design once Im happy with it, (or once Im sick to death of drawing different patterns), and I draw a straight line underneath it that goes from end to end.
This line will help me arrange photocopied inlargements later.
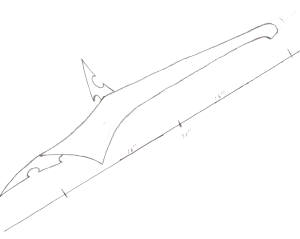
I decide how long I want the weapon to end up at, and use the straignt line to indicate this. How this is done is, I place marks to show how big it should be, for instance On my Warclub I want it to be around 32 inches long when completed. I therefore marked the line near the end to say '32' inches, I then added a half way make to show where '16' inches will be on the lower line, and then '8' inches ect,ect.
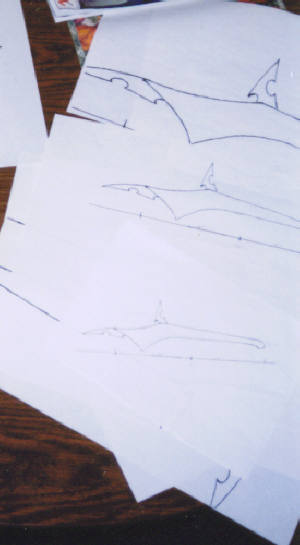
My goal now becomes very simple, Just use the photo copier and make inlargements untill the actuall mesurments correspon to the line drawing and marks made under the pattern.
It takes a few trys to find the right inlargement settings on my photocopier, but its not that hard to do.
What you end up with is a series of photocopies of your pattern design, each showing a bit more of the design than the next.
You then simply arrange the patterns out on a flat table and line them up in the right order.
This is where that line I drew under the design helps out the most. I just have to arange things with the line becomming as straight as I can make it. Once this is all done, I carefully tape the different photocopies togather. 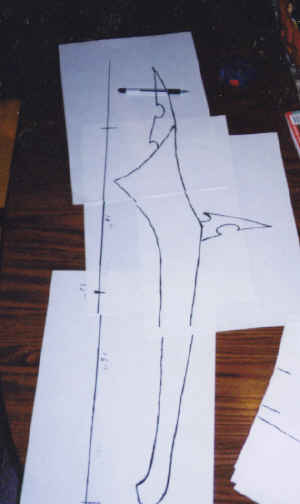
Place the tape directly onto the pattern, this will allow you to cut out the pattern as a single unit. Once you have your pattern all cut out, (Think we are done yet? NO! not yet...) take this pattern and carefully tape it to a peice of construction grade paper. This construction paper will be your final pattern, trace around the photocoped inlargements to make the pattern now appear on the construction paper. Now just cut out the construction pattern and....Now You Have Your Patern! QUESTION; Why go to this much trouble to make a pattern out of thicker grade construction paper, when a pattern made from reg. paper would work and is faster?
ANSWER; This is the only way I know how to do this,and the reason I need to make a heaver paper pattern is that later on, I will expose this pattern to lots of heat during the drilling phase, as well as to the drillpress cutting oils.
When I start to drill around the pattern to free the weapon from its bed of steel, the drill bits will tear out and spin off hot shards of steel. If my pattern is not stout enough to take that type of beating, it will most likely shread or singe from the heat.
|

