|
I find the "Design Stage" to be the most troubling. That first moment when I confront a blank sheet of paper is very intimidating. I do all my design drawing in the kitchen on the dinner table. With this new Weapon, there is not a lot on the internet about it so I have had to rely on my intuition of what the sword should look like.
I decided to change a few things about the sword's outline from the TV sword. I have altered the middle point, adding some cut-outs and I have changed the curve that goes from the middle point to the inner tines. 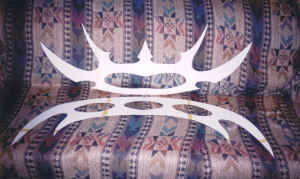
I decided to keep the overall size of this sword about the same as the standard Bat'leth (about 116 cm)
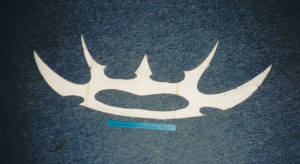
In this Photo, we see the pattern cut-out and laid next to my paper pattern for the Bat'leth.
This gives you a better comparison between the two different weapons.
You can also see how I have changed the handle hole dimensions , and enlarged them. Another thing I did was to make the Handle a bit thinner. It's now 1 and 1/4 inch wide. This width will be perfect when I cover the handle with the oak spacer and sports handle wraps.
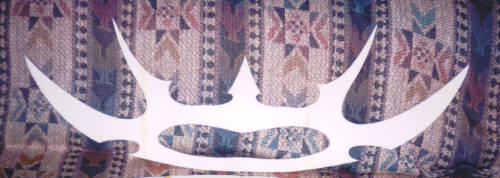
Paper Pattern of the Sword Of Honor.
The Development process so far;
Start with enough blank white paper (I use a thicker construction paper) that has been taped end to end so that you have a sheet long enough to contain the finished pattern. I also prepare a 2nd set of taped together sheets of white paper for the first design drawing.
The design drawing will only have to be of one of the halves of the bat'leth, and then simply flipped over and traced for the remaining side. 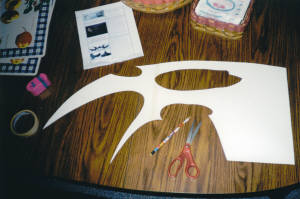
By using photocopies printed off the internet to give me a rough guess of the sword's shape,and a healthy dose of imagination, I draw the design for one half the Sword of Honor, then cut it out.
This 1/2 design drawing is then placed on top of the larger sheet of taped together paper and traced around , flipping over to do the other side and finish the pattern.
Once you have used the design half to produce a full size pattern onto the construction paper, you then carefully cut out the pattern, following the traced lines.
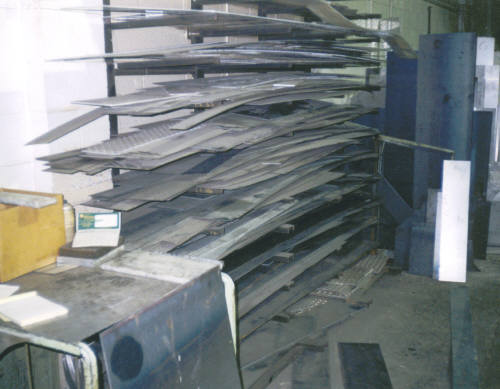
The next step is getting the steel for your weapon.
There is a shop near where I live that has tons of leftover scrap steel that I can look over.
I used to make all my larger weapons out of 1/4inch stock, but due to the weight and how hard it was to work, I have switched to useing only 3/16inch. The 3/16 is way lighter and lets me work the steel without haveing to use things like messy cutting-oils. The down side is that 3/16inch will not give the depth to the blade edge that some like on their weapons. The reason I dig though the piles of scrap steel is that they often will charge me for any cutting they have to do. It much easier to just slightly change the size of my Pattern outlines to fit whatever steel I happen to find.
Yes it pays to be Lucky! 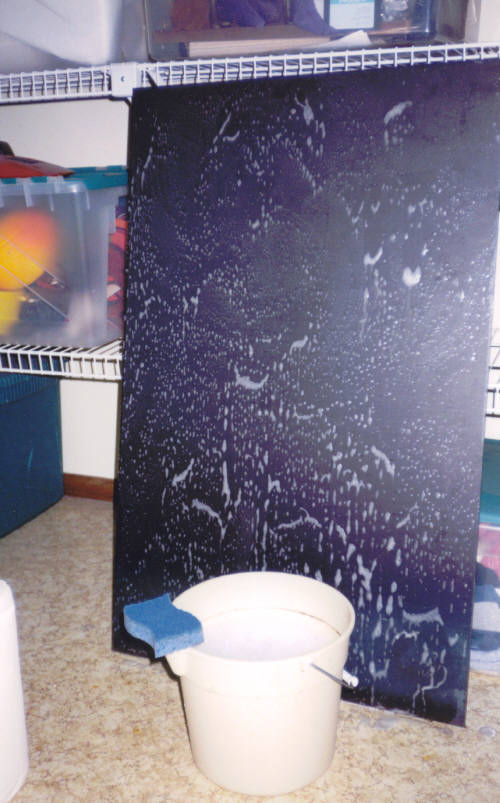
Steel that has been sitting in a shop for a while often has a layer of dust on it, as well as the odd footprint or two.
After I get the sheet of 3/16inch steel home I like to wash it with soap and water first. I really only need one side clean to stick my pattern to, but it does help to clean both side to make sure I keep my work areas clean at the start here. 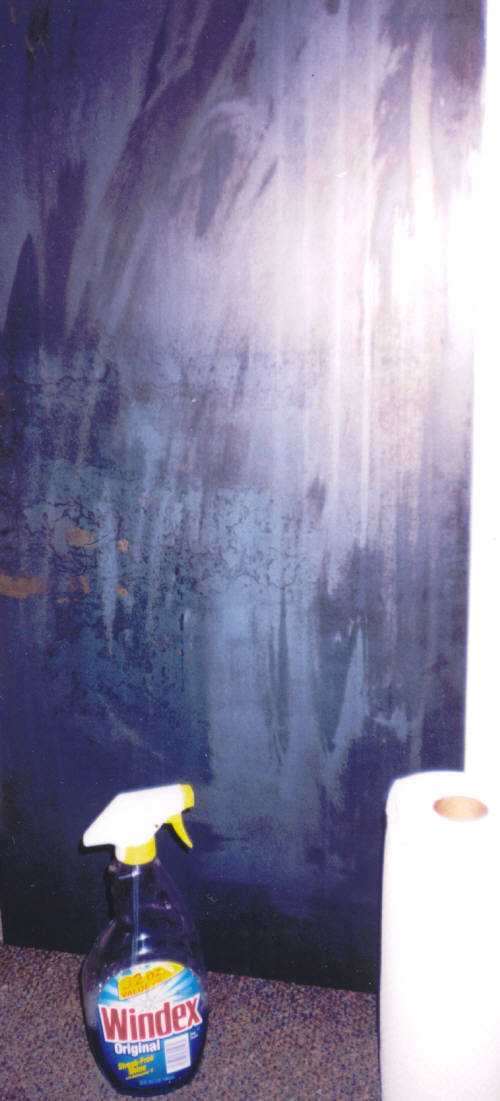
Once the steel has been washed with soap and water, I next like to go over it with Windex to get rid of any fingerprints it might still have on it. At this point I decide what side of the steet of steel will work best to glue my pattern onto. 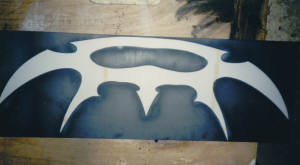
Time to glue your pattern to the steel!
To do this step I take my cut-out paper pattern that is made of the thicker paper, and place it on top of the steel. I make sure that the pattern will actually fit onto the space the steel leaves me. Once I have the pattern in just the right spot that I wish to glue it in, I spray it with glue.
I make sure that if I might accidently spray the floor to have a dropcloth down to catch the over spray. I give the pattern a real good coating of sprayglue. 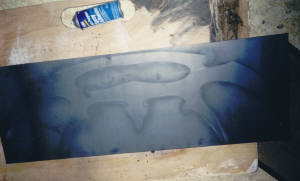
Now carefully pick up the paper pattern and place it off to the side for a moment while you spray the steel itself.
When you pick up the pattern off the steel you will see a cool spray glue shadow effect where your pattern was. This shadow effect will show you where to spray the glue down. This shadow of the pattern (made from the overspray when you were spraying the paper pattern) will be a slightly different color than the fresh glue that you spray now.
This difference will also help you line up your pattern as you lay it, sticky side down, onto the steel. Remember to flip the pattern around in the air as you start to lay it down so it will line up with the shadow that marks where it's meant to go.
I found out this "shadow trick' over time when I needed a better way to make sure that bigger patterns got laid down where I wanted them to go. You only really get one chance to lay patterns down due to the way it will tear if you try to pick it up and try again. The shadow shows you just where you want it to go, and lets you just worry about making sure your pattern does not kink. 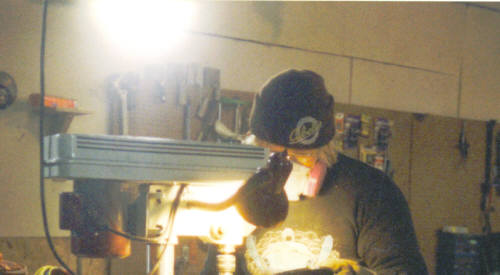
Now toss on your hat and safety glasses, for its off to the cold shop to start drilling this thing out.
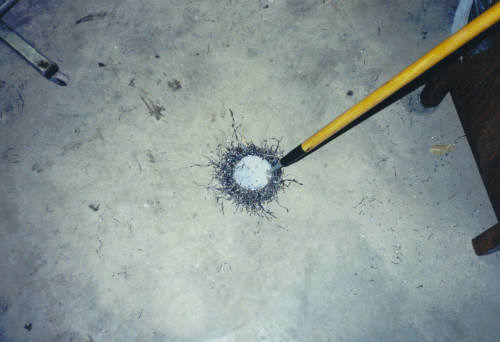
Useing the drill press, I drill holes all around the pattern lines. I try to keep each drilled hole just bumping the one next to it. I know this takes a long time to do on the larger weapons like the Bat'leths, but this is the only way I know how to do this. 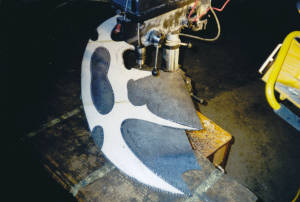
There is doubt about it, drilling this many holes all around the Sword Of Honor is going to make a big mess.
Each drilled hole takes out a bit of steel that will come whipping out and fly across the floor. I used to sweep the floor, but all that bending down got to be old. So now I use a magnet on the end of a stick. This job became actually kinda fun!
At the bandsaw the small bits of steel that lay between each drilled hole are cut. In the tight curves you may have to use a jigsaw to 'connect the dots'.
Once set free from its bed of steel, we can now start to see what this weapon will soon look like. 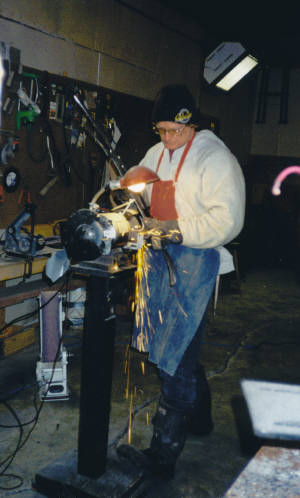
At the grinder and beltsander DaQo'tah takes off the left over 'nibs' of steel down to the pattern lines.
The outer edges are made flush with the pattern. 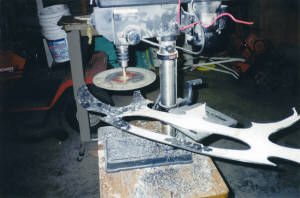
Once the outline of the steel has been sanded right down to the pattern lines, its time to start sanding the sides of the blade.
Here you see a sanding/cutting disk that has been "chucked" into the drillpress. This type of cutting disk makes short work of getting rid of the glued paper pattern. 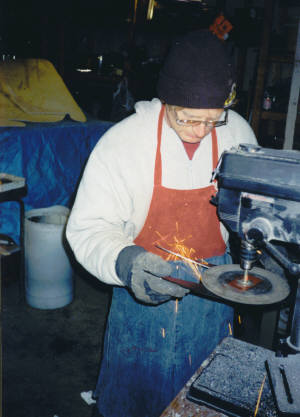
Since I'm going to color the sides of the blade later, I need to have tons of scratches that can catch the light better. Here I am using the disk sander attachment on the outer blades of the weapon to make some cool looking scratches. Notice the apron Im wearing? , I learned the hard way that sparks can burn a hole right down to ya. 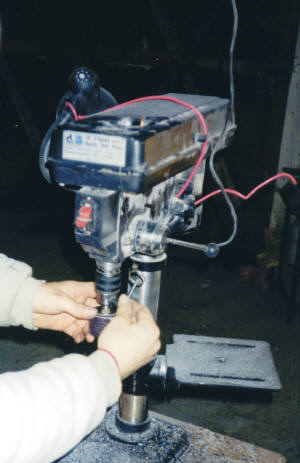
This photo shows me using the chuck-key to put a sanding drum on my drillpress. I dont know if you can make out in this photo or not, but the chuck-key is connected to a telescoping key ring that is attached to the top of the drill press. This keeps the Chuck-key from getting lost. When I need to use it I always know right were it is, and when Im done using it I dont have to put it away, I just let go of it,and ZIP it goes rignt back to the top of the drillpress! 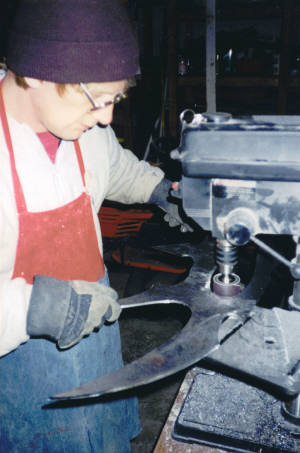
The drumsander makes short work of the inner handhole areas. This is the real reason I like to make the handholes on my Bat'leths a bit bigger than others make. It allows me to use my drumsander attachments!
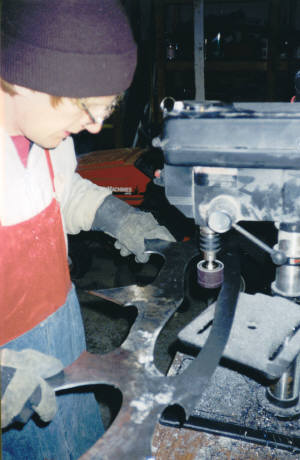
There is a little table on my drillpress that goes up and down. Here I have set it at the correct level that allows me to just slide the sword back and forth across the drumsander.
Notice the telescoping keyring device at the top of the drill press cover? 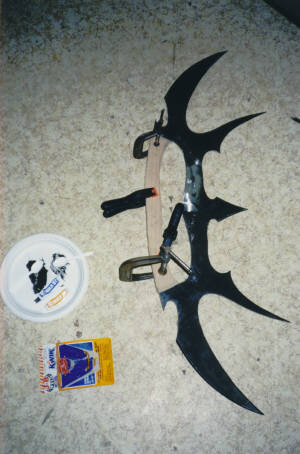
I have always used J-B KWIK to glue my handles on. My handles are made of American Oak, so they are very strong, and this type of glue sets up fast and holds up under heating.
The clamps seen here are only to hold the handle in place untill the glue is hard (about 5 min) 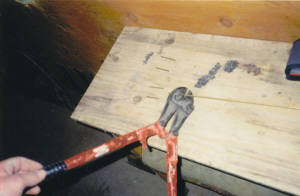
In addition to the J-B KWIk, I also place brass pins into each end of the handle to keep it in place no matter what happens to it.
The brass pins are cut from 1/4 inch brass rod. One end is sanded to a point,and then the sides are lightly sanded to provide better grip for the glue. 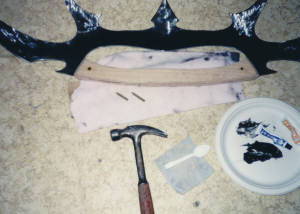
In this photo the brass pins are right above the hammer . I mixup a good amount of glue, then places some into the hole, roll the pin in the glue, then set it into the hole sharp point down. Then you just pound it into place with the hammer,leaving a bit sticking out on each side. 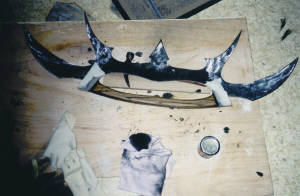
When all the glue has had a chance to set hard,,I sand the whole handle down. First I sand the brass pins down flush with the oak sides, then I work on the rest of the handle.
I try to keep sanding and rounding things up untill the handle feels "at home" in my hands.
After I have moved from the rough sandpapers to the light stuff, its time to stain the oak a rich color.
I like to use very dark stains, but I do not leave them on very long before I rub them in. This seems to give a richer finish.
In this photo you can see that the handle has been stained and rubbed down already and it now set down to dry. Notice that on this Bat'leth I didnt have to worry about getting some of the stain onto the blade, this is because the blade's finish is not in its final form yet. 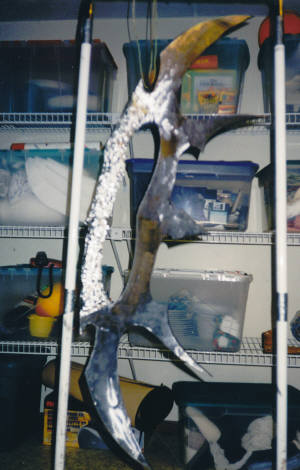
I wrapped the oak handle in tin foil to protect it from the torch, then hung the Sword up on a hanger I made just for this purpose. Im now going to heat the steel until it starts to change colors.
I had just started to heat the steel up when I decided to stop and take this photo , I wanted to show a Before, and After shot of the coloring effects. 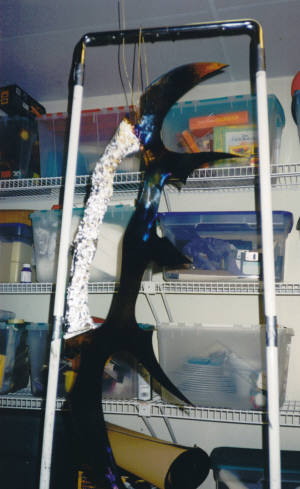
You have to go slow with this step,,you dont want to do a rush job here and ruin a weeks worth of work. The torch is kept moving slowly over the steel,,,watch out for the places where the blades are thinner, for they will change colors faster than other parts. You are painting the steel with the fire. 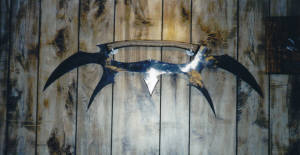
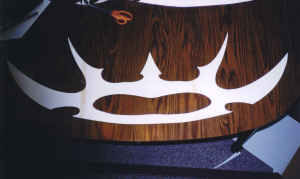
This is a photo of what the Sword looked like before it was colored,,,,the colors you may notice are just the reflections of the lights and wood paneling. 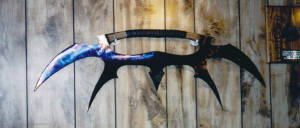
And this is what the Sword of Honor looked like when it was done!
The handle wraps have been placed and the blade has its final colors.
Not bad for a few days work!
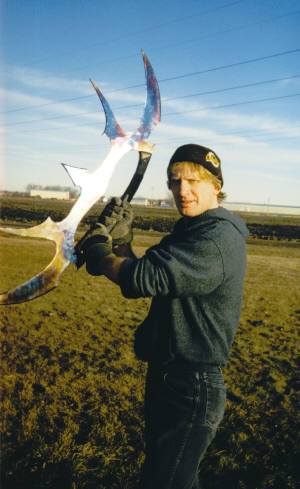
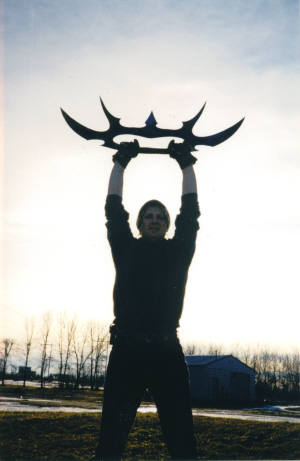
Time for DaQo'tah to take his latest weapon outside for a test drive...
| ! |
|
|